
You cannot take your mask off during a standard PAYDAY 3 heist. Masking up ends Casing Mode for that player, but the crew can still finish in stealth if the alarm stays down. Start a fresh attempt that begins unmasked if you need Casing Mode again. The same rule matters in co-op: one player can mask up for an interaction while another stays unmasked to handle the parts of the route that benefit from Casing Mode. Firsthand discussion of the unmasking mechanic
When to mask up and how to start over
Save the mask for the first objective or action that needs it. You can scout, pickpocket a keycard and interact with many objectives while unmasked, so locating the correct door usually comes before deciding to mask. If a route requires holding a hostage or jumping through an opening, confirm where you will go afterward while you can still move as a civilian. Walking out to a public area after masking leaves you masked, and neither a guard escort earlier in the run nor a break in detection resets the choice.
If you put it on accidentally, decide whether the remaining route works masked or whether everyone should restart. A restart gives you Casing Mode only when that contract or start option actually opens unmasked. If the contract starts in Infiltration with masks on, a restart with the same start conditions leaves that constraint in place. The control used to mask up also changed in Skills 2.0, so check your current bindings if an old guide names a different button. Skills 2.0 controls · Infiltration banner fix
Before starting a new contract, look at its description and decide whether you are practicing the route or aiming to finish a challenge. On a practice run, keep track of which interaction forced you to put the mask on and which one simply felt risky without it. On the next attempt, stop at that point long enough to check the objective text and see if anything has changed. The official tutorial, revised in 3.6, is also an option if you want to learn the controls before committing to a longer heist. Starbreeze’s guide and controls
Use the area label to judge the risk
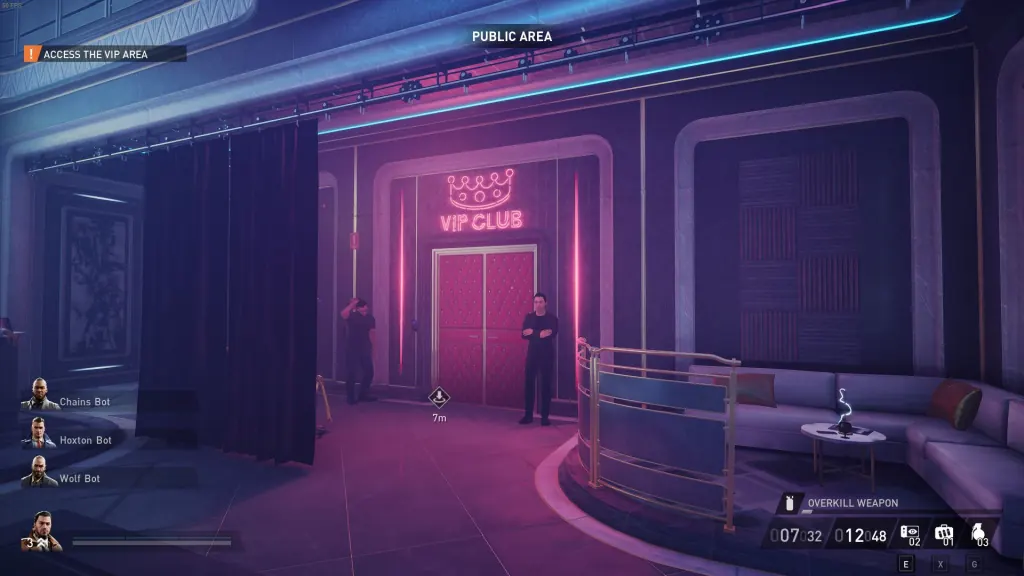
Public areas are where unmasked players can normally move openly while behaving like civilians. In a private area on the standard baseline, simple trespassing can lead to an escort back out while an illegal interaction can get you detained. Secure areas are stricter and can lead straight to detention when you are caught. Verify the area label at each doorway and treat any contract or difficulty rule shown in the lobby as part of the route. Guard distractions and detection by area
Watch the guard's return route as well as the initial opening. A lure can clear a doorway long enough to enter and leave it covered when you need to come back with a bag. Give the player waiting outside a clear task, such as confirming whether the doorway is still open or receiving loot once it reaches a safe area. If you are solo, locate a place to break line of sight before committing to an interaction whose prompt takes time to complete.
Can you drop a keycard or give it to a teammate?
There is no standard drop or handoff command for a picked-up keycard documented in the normal heist controls. Player reports describe the person who collected the card opening the matching door, then the rest of the crew using that opening as the objective permits. The loot-bag drop or throw control is for bags. Use the interaction prompt at the reader and confirm the matching color and the teammate who has the card before sending anyone down the corridor. Player reports on keycard controls
In co-op, call out the card color and ping the matching reader so the holder can use it. If you are casing the location and someone else is already masked, it can be easier for you to take the card and make the first trip, provided the route allows it. Follow the objective text for other credentials because a QR code, an invitation and a keycard can have different interactions even when all three open a door. The Rock the Cradle business card guide explains one such distinction.
The 1.1.4 patch notes document an automatic transfer of key items when their holder goes into custody. If that happens, ask which player received the card before sending someone back to search its spawn point. In a normal run, have the current holder operate the reader so the crew can stay on the objective.
What triggers Search Mode and can you undo it?
A guard checking a noise may walk over to investigate. Search Mode is a broader change to the run that can follow suspicious evidence or radio escalation, and patrols may change even if nobody has raised the full alarm. Check the stealth HUD after answering a guard radio: its remaining-radio indicator names the next threshold as search or alarm. Read the actual counter in your run because a difficulty or contract can change the starting conditions. Radio threshold display in update 3.5
Search Mode can still be salvaged as stealth. Waiting in a hiding spot can let a guard pass, but there is no documented general reset that returns the heist to its original patrol state after a search begins. Recheck the path to the objective and extraction, keep to the public side when it is safe to do so, and expect detention in private areas that would previously have led to an escort. Restart if the objective requires the original opening, or decide as a team whether to continue if the alarm goes off. Firsthand stealth notes · Player observations of sustained searches
A contract-specific search can be more local. Houston Breakout’s blue-keycard objective was changed in 3.9 so that guards search only the rotunda and hallway for that item, and its waypoint can remain visible after going loud. Use the objective label and the HUD state together when a contract introduces its own search behavior. On Dirty Ice, 3.10 fixed the outdoor-ramp guard cuffing a trespasser when that situation should have led to an escort. Houston Breakout’s keycard objective · Dirty Ice ramp fix
How to use an ECM Jammer
Select ECM Jammer in the Tool slot before the heist. During the run, use the placement prompt on a compatible surface, then activate the placed unit with the phone interaction. The active signal buys a brief window by slowing detection by cameras and delaying guard radios. Older player tests and an in-game tooltip describe stronger interference with overlapping units, but treat exact duration and stacking figures from older builds as version-specific; plan for short coverage and use the on-screen feedback. Firsthand ECM test
With Skills 2.0, Pump The Jam is the marking option and its Ace upgrade adds a starting jammer when one is equipped. Electrical Interference adds a combat effect while the signal is running and the crew shoots enemies. That is a reason to equip the tool for an alarm fallback if your build already spends points in that part of the tree. Use the current skill tooltips to confirm which effects and recovery conditions apply to your setup. Starbreeze's skill previews · Official skill simulator
A stealth build for cameras or moving patrols
For a camera-heavy route, start your Skills 2.0 template with Playback. Since update 3.6, you can access camera hacking without a skill, base Playback spends a Runtime for a ten-second loop, and its Ace upgrade makes the loop permanent. Security Expert now spends a Runtime to mark targets through a hacked camera, with drone hacking on Ace. A loop solves one known sightline, which is useful when the crew has to use the same doorway repeatedly. Camera changes in update 3.6
Playback Ace is permanent under the ordinary skill rules, and a contract modifier can shorten it. Players have reported early resets with Cerberus Core. Check the contract card and verify the loop again before you cross a camera for the second time.
If a roaming guard is the obstacle, build around Radio Star and use a Micro Camera or Motion Sensor to check where the patrol has gone. Add Strong Armed and equip throwing knives only if your route calls for a knife interaction while unmasked. In solo play, choose the tool that covers the room you cannot watch; in a crew, split that job from operating doors and objectives. Try the plan on Dirty Ice or compare it with the VIP approach in Rock the Cradle.
Two stealth loadouts you can copy
Zero-point scouting loadout: A CAR-4 as a fallback, a Signature 40 with a compatible suppressor, Medtech with an Impact plate, a Micro Camera and an Armor Bag. Keep the throwable and OVERKILL slots on your currently unlocked equipment; this route does not depend on using them. Begin at 0 skill points and use cameras for scouting, since update 3.6 allows camera hacking without a skill. Try this on a Normal route first so you can see exactly where a loop or a distraction would help. Unaided camera hacking in 3.6
Camera and patrol loadout: Keep the suppressed weapons, use Specialist with an Impact and a Resistant plate, and bring a Micro Camera or Motion Sensor. Set Playback to Ace if you need the same camera loop on several return trips, then add Radio Star for guard interference and Security Expert only if the route needs camera marking or drone hacking. Add Strong-Armed with Throwing Knives if you need the unmasked interaction, and use Interceptor as the OVERKILL option if available. Record the complete points required by your current tree after the tier gates; these are role choices rather than a fixed allocation for every route. Playback and Security Expert in 3.6 · Strong-Armed and Radio Star skill descriptions
Run the route once with that equipment and check how often each skill actually solves a problem. On OVERKILL, read the contract’s current modifiers and remaining radio thresholds before relying on the same openings. On a map without drones, spend those points on the skills that change your return trip. Compare armor frames and plate tradeoffs and record your choices in the skill planner.